
You are going to make some improvements to the test created in the previous tutorial.
Adding a background circle
To facilitate the location of the stimuli , you can add a background circle below the stimulus.
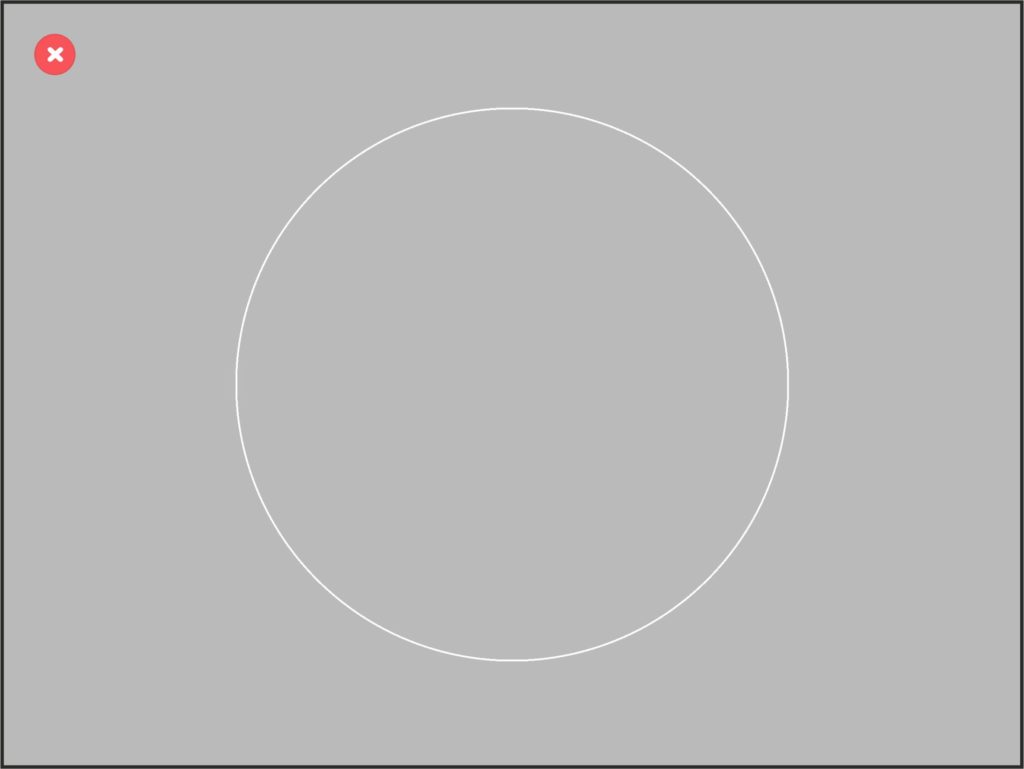
Go to the Stimuli menu, create a new stimulus and name it circle.
Change its shape to ellipse.
Change its size to 1200 pixels.
Within the Contrast group, change the contrastValue to zero. Now the circle is not visible.
Go to the Border group and add an opaque border. Change the color to white.
Preview the stimulus to verify that everything is correct:
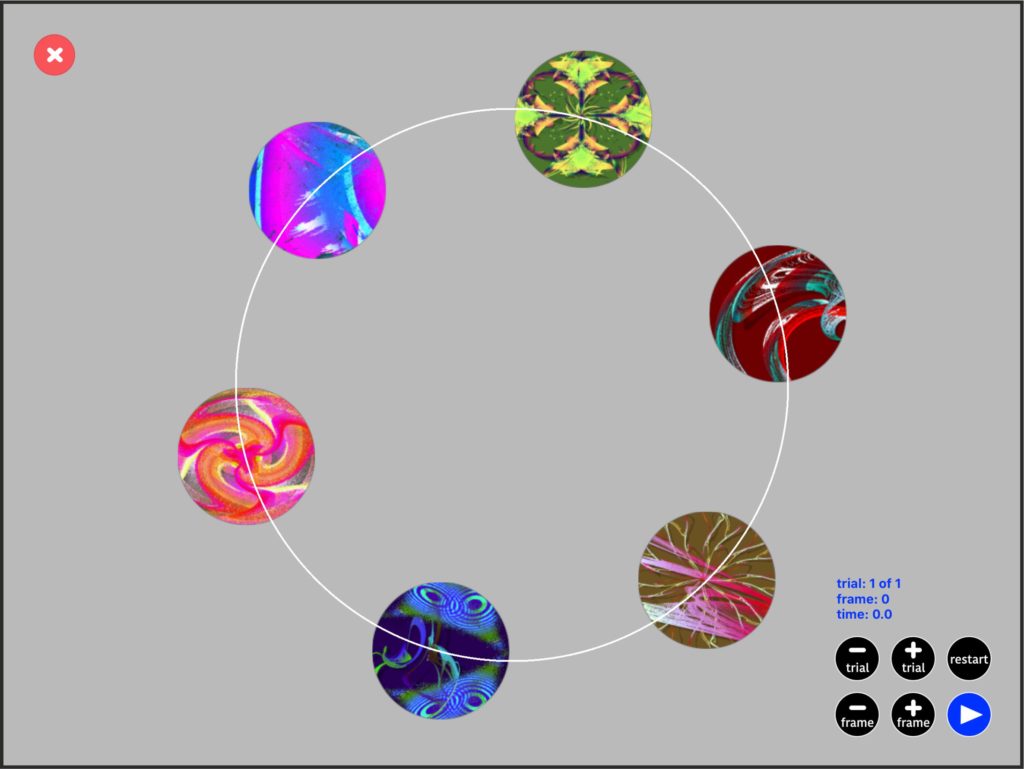
Go to the allFractals scene within the presentation section. Add a new object from the new circle stimulus.
If you preview the scene, the background circle is not complete:

This is because, by default, the number of layers in a scene is 1, i.e., all objects are drawn on the same layer, which is drawn on top of the background.
If you want to draw an object on top of another, you must increase the number of layers.
When drawing objects, a preassigned space is saved for each one of them. This space is slightly larger than the object itself. If two objects are too close to each other, their respective preassigned spaces can interfere, creating an unwanted empty space between the objects. To avoid this, you need to increase the number of layers.
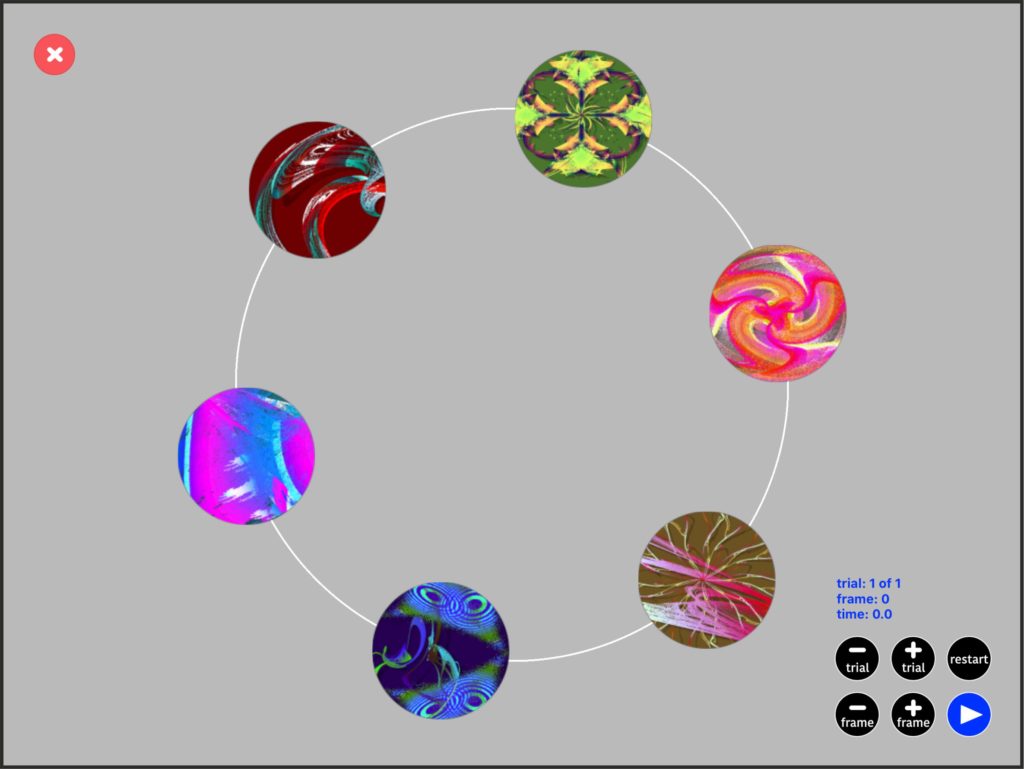
Within the Background and layers group change the number of layers to two and preview the scene again.
Now the circle is drawn entirely but it is in top of the other objects.
Click the Edit button at the top righ of the screen and move the circle object to the top of the list of objects.
If you preview again, now the circle is below the fractals.
Now go to the oneFractal scene inside the trials section.
Add a new object from the circle stimulus.
In the Scene response group there is a property name endPath.
- If endPath is set to lift, the response ends when the participant lifts their finger from the screen.
- If endPath is set to touch object, the response path ends when the participant touches any object other than the moving object.
Set the endPath property to touch object. Now the response does not end when the participant lifts their finger but only when the moving object touches the border of the white circle.
Note that the object2 (the white circle) must be not interactive. Otherwise you could unintentionally move the object.

Having two layers, the test may not run smoothly at 120Hz.
If that is the case, if the number of long frames is significantly different from zero, you will need to run the test at 60Hz or use a simpler version of the test with only one active layer.
Adding feedback
You must first determine which responses are correct and which are incorrect.
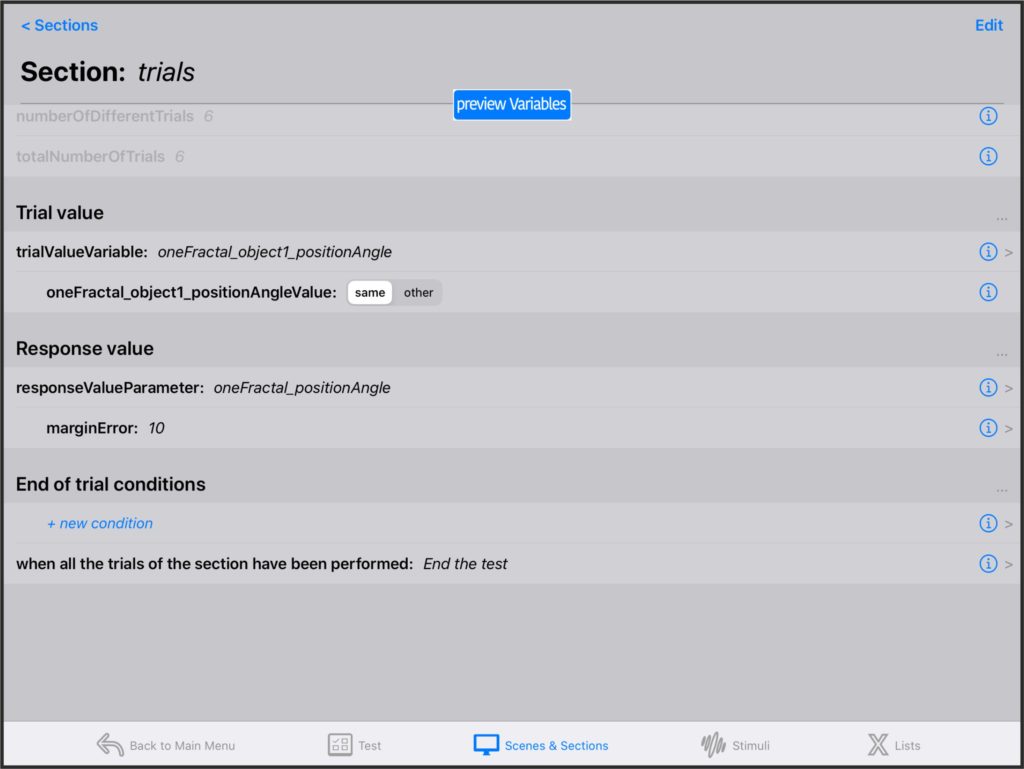
Go to the trials section and assign a value for each trial, within the Trial value group change the trialValueVariable to one_Fractal_object1_positionAngle.
The object1 always appears in the center of the screen because its positionRadius is zero. But its positionAngle is the angle that corresponds to its image. You have assigned this angle to be the value assigned for each trial.
Now, change the responseValueParameter to oneFractal_responsePositionAngle. For all the parameters that configure the response: object touched, radius, angle… you assign the response value to the angle of the response.
For each trial, the value of the response (the final angle of the response) will be compared with the value of the trial (the angle associated with the image on the screen) and if the difference is less than the marginError, the trial will be considered correct.
Set marginError value to 10. When the angle of the response and the angle of the image differ from less than 10 degrees the trial will be considered correct. The trial will be considered incorrect in any other case.
Now add a new scene in the trials section and name it feedback. Change its duration to 1 second.
In the Background and layers menu, change the color property to variable.
Go to the Lists menu and create a new list of colors.
Add 2 different colors:
- 0;1;0: green color for correct responses.
- 1;0;0: red color for incorrect responses.
Go back to the trials section. Select the new variable: feedback_background_color.
Assing the values of the list of colors to the variable.
Change the selectionMethod to depends on correct.
Change the selectionMethodCorrect to correct/incorrect.
- After a correct response, the variable value is the first value of its list. (The green color).
- After an incorrect response, the variable value is the second value of its list. (The red color).

There is another way to add feedback. Instead of creating a new scene in the same section whose color depends on a variable, you can create 2 new sections (correct section and incorrect section) one with a green screen and another with a red screen.
Then you can add a condition in the trials section:
- when the number of trials = 6: End the test.
- when the last trial was correct: go to the correct section.
- when the last trial was incorrect: go to the incorrect section.
Adding seeds
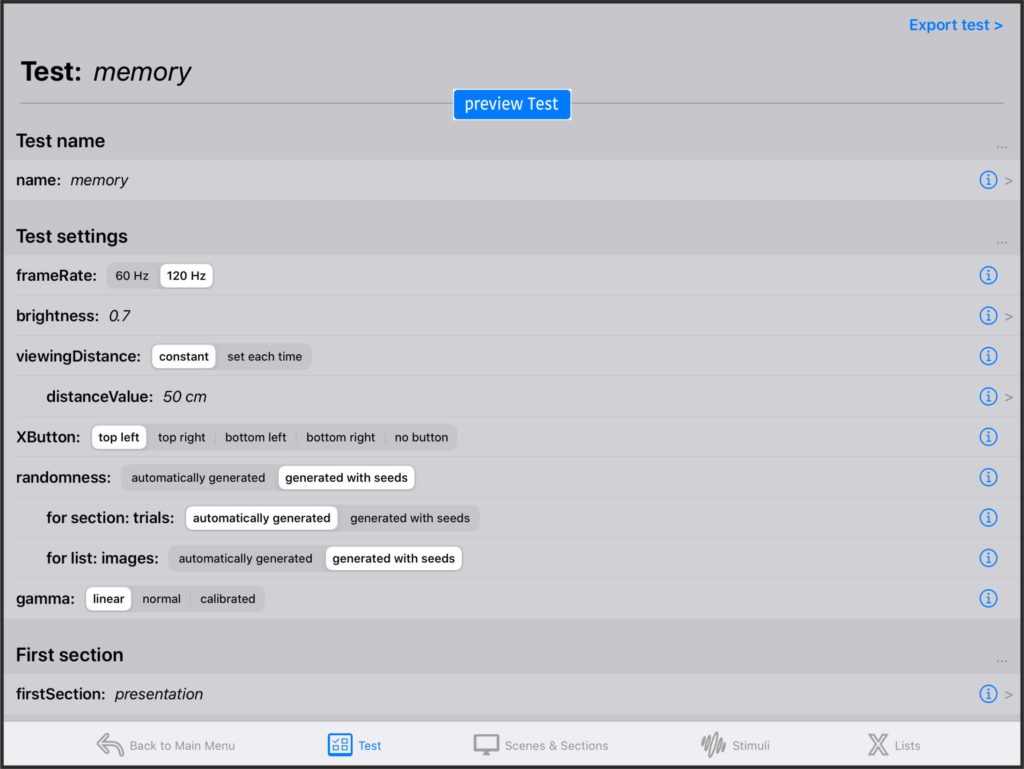
Go to the Test menu and change the randomness property from automatically generated to generated with seeds.
There are 2 different random processes in the test.
The first process is the selection of the order in which the images appear in the section trial. Leave it automatically generated.
The second random process is the order of the images in the list of images. That list is shuffled once at the beginning of the test. Change the value of this random process to generated with seeds.
Run the test
Wen you run the test, you will be asked to introduce a seed for the list of images.
If you introduce the same seed for multiple tests, the position of the images will be the same each time.
The order in which the images appear when the participant has to respond will be different from trial to trial because that seed is generated automatically (differently) each time.
After each response a green or red screen should appear depending on whether the error is larger than 10 degrees or not.
You can download a version of this test from the downloads menu of this web page.
In the next tutorial you will create a test in which you will play some sounds.