
In the previous tutorial, you created a test where the participant must judge the movement of a circular grating.
One of the most widely used stimuli in psychophysics is the gabor.
A gabor is a grating whose contrast is modulated by a gaussian envelope.
In this tutorial you will add the gaussian envelope to the existing stimulus to transform it from a circular grating to a gabor.
Creating the gabor
First, go to the Stimuli menu in the navigation bar and select circleStimulus.
Change its name to gabor.
Try to preview the stimulus. An error appears because it is not possible to preview a stimulus if some of its properties is variable.
Make the value type of phaseSpeed constant. You will change this again later.
Now you can preview the stimulus. The stimulus will be presented very briefly because you set its duration to 0.2 seconds. Change the duration to a longer value for now.
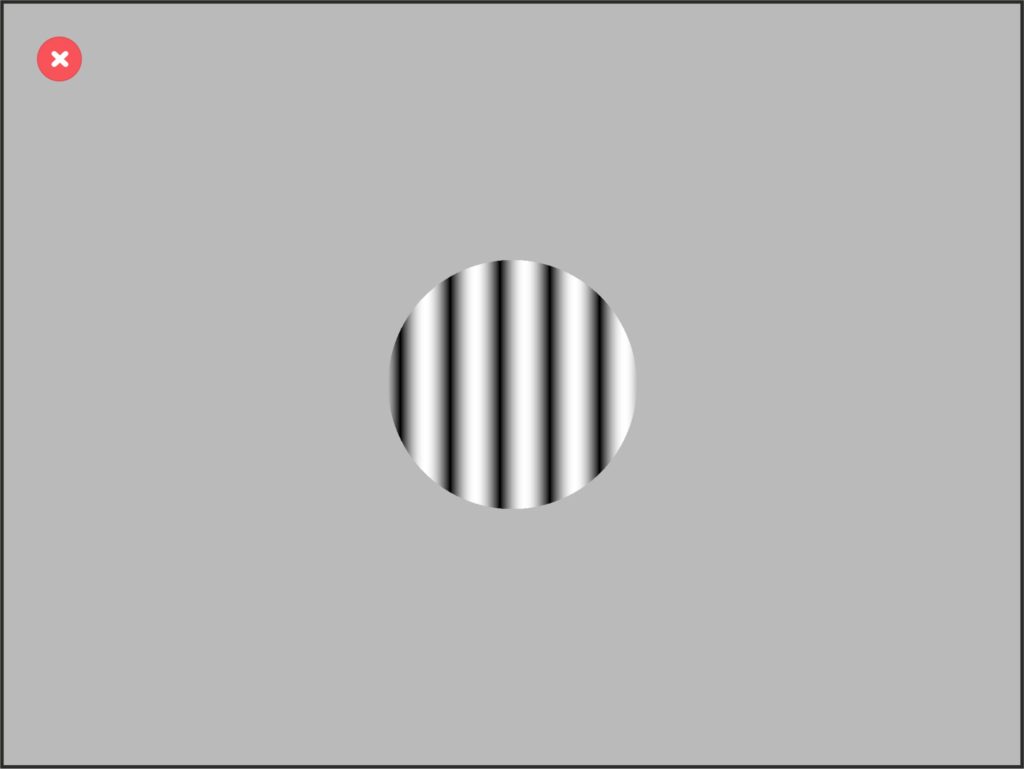
Change the size of the stimulus to 5 visual degrees and preview the stimulus again.
Go to the Test menu in the navigation bar and change the value of the viewingDistance property. Now, go back to the stimulus and preview it once more.
If you have increased the viewingDistance, the stimulus should appear bigger in the screen and if you have decreased the distance the stimulus should appear smaller, to ensure that the size of the stimulus is always 5 visual degrees in the retina of the participant.
To create a gabor, the grating contrast must be modulated by a gaussian envelope.
To do this, go to the Contrast group and change the contrast property from uniform to gaussian.
Change the value of contrastGaussianDeviation to 1 visual degree. The value of the deviation determines how quickly the contrast decays from its maximum value as the radius position is increased. So, it is a measure of the visible size of the stimulus.
If you preview the stimulus again, the borders of the circle are visible, that means that the size of the stimulus is not large enough with respect to its contrastGaussianDeviation.

Change the size value to 7 visual degrees and preview the stimulus again.
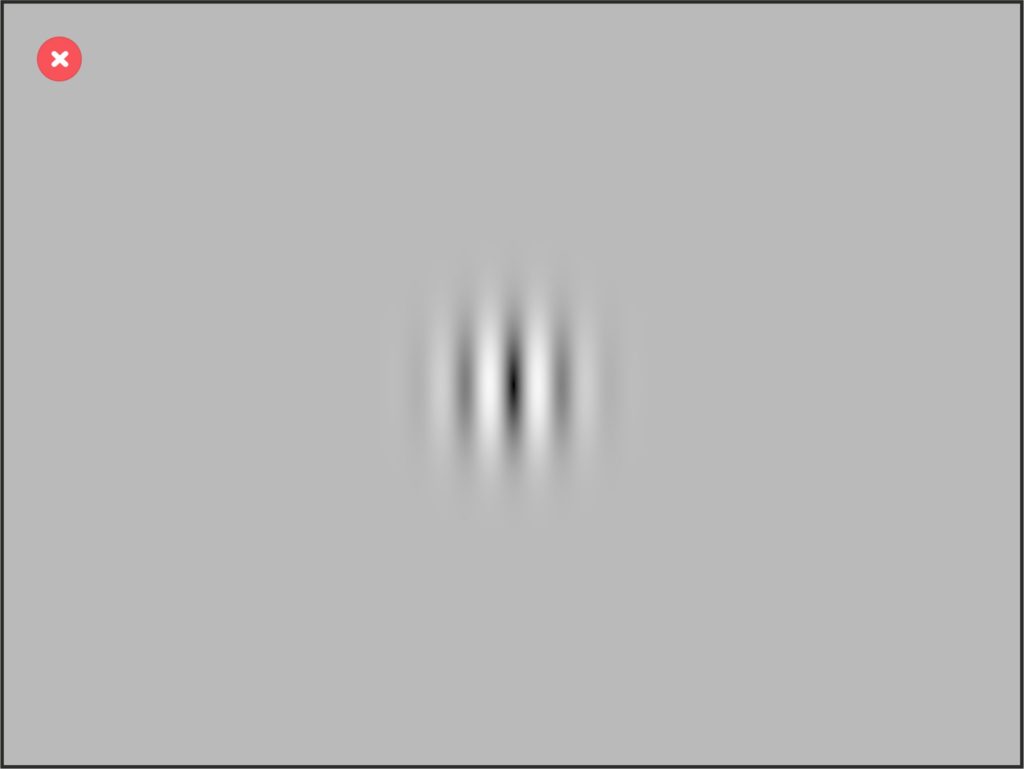
Now, the gabor is correctly drawn in the screen.
The value of contrastGaussianDeviation is a measure of the visible size of the stimulus. The value of size does not matter as long as it is large enough to accommodate the whole gabor.
The larger the size value, the greater the computational cost of drawing the object, so try to use the minimum possible size value for which the object is drawn correctly.
Change again the value type of phaseSpeed to variable.
Change again the duration of the stimulus to 0.2 seconds.
Changing the section
Go to the Scenes & Sections menu in the navigation bar and select main.
Assign speedValues to the presentation_object1_phaseSpeed property again. Change its selection method to all values in random order.
Back to the main section, add a new scene after presentation and name it empty. Change its durationValue to 0.2 seconds.
Before adding this new scene, the fixation cross appeared just when the participant touched the screen. Now there is a small delay of 200 milliseconds between the response and the appearance of the fixation cross. This way, the flow feels more natural.
Run the test
As always, go to the main menu and run the test.
Summary
- Go to the circleStimulus and change its name to gabor.
- Change the size property to 7 visual degrees.
- Change the contrast property to gaussian.
- Change the value of contrastGaussianDeviation to 1 visual degree.
- Go to the Scenes & Sections menu and select main.
- Add a new scene after presentation and name it empty.
- Change the duration of the new scene to 0.2 seconds.
You can download a version of this test from the downloads menu of this web page.
In the next tutorial we will finish this test by adding more variability to it.