
After creating a very simple test and familiarizing yourself with the
A fixation cross is displayed for 500 ms in the center of the screen. Then, a moving grating is briefly displayed. Sometimes the grating moves to the left and sometimes to the right. The participant must decide in which direction the grating has moved and respond accordingly by touching the left or right side of the screen. This judgement is repeated several times. At the end of the test, a results report is created, containing the variables and the participant’s responses.
Duplicating the previous test
First click the Tests menu in the navigation bar. Click and hold on firstTest and a pop-up menu will appear with the option to duplicate the test. Click Duplicate and a new test named firstTestCopy will be created.
Open the new created test and rename it to motionDiscrimination.
Changing the stimulus
Go to the Stimuli menu and select circleStimulus. In the previous tutorial you made the rotation property of the stimulus variable. In this case the rotation property must be constant with value equal to 0. Click the rotation property and change the value type to constant.
Now you need to make the grating move to the left or to the right. To do that, within the Stimulus type group, change the phase property and make it time dependent. The phase must change linearly. Among the different functions that can model temporal changes, choose the linear function. Change the unit to degrees and click OK.
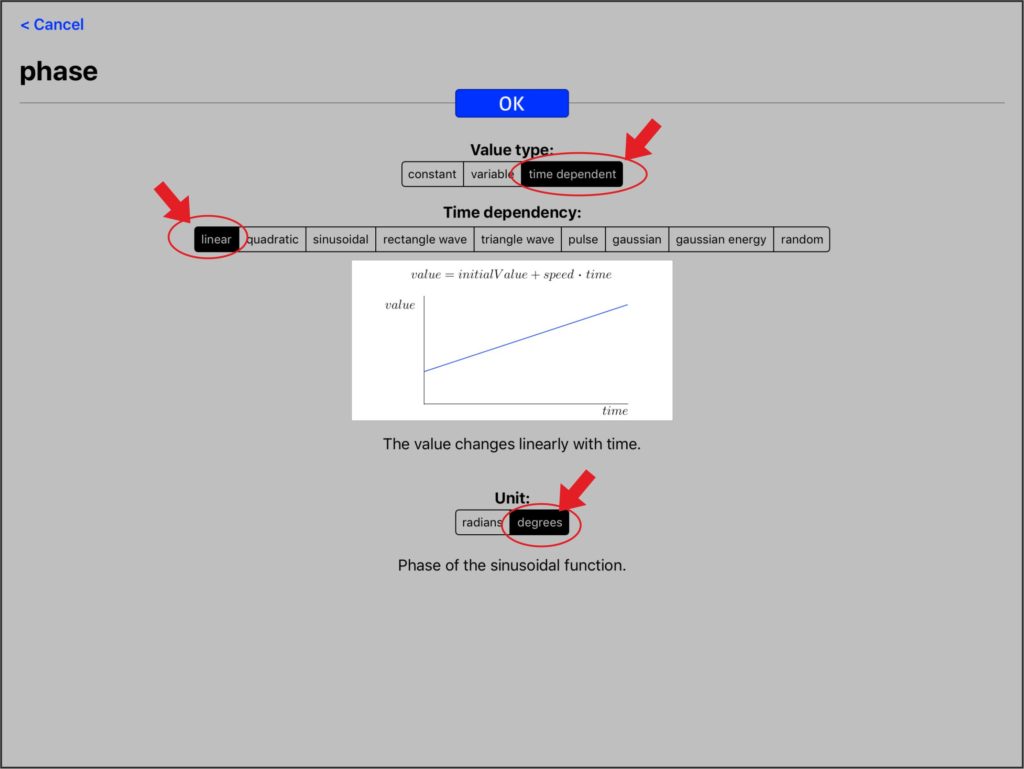

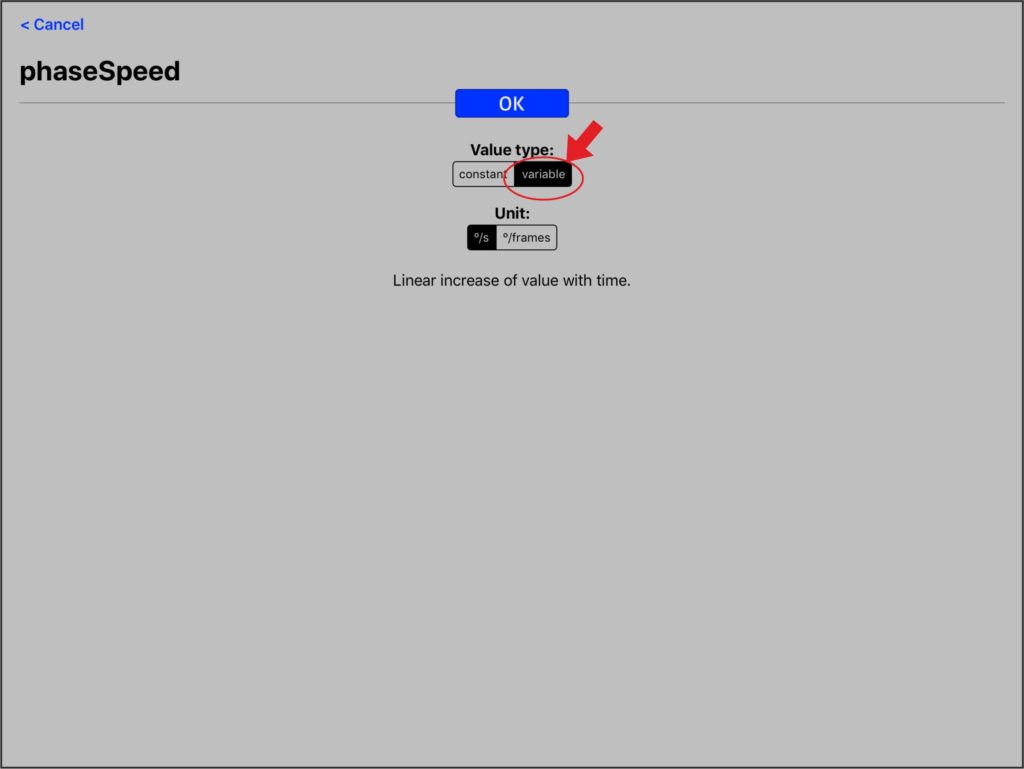
New properties have appeared to control when the phase’s movement begins and ends, its initial value and its speed. Change the value of phaseSpeed to 360 degrees per second, so that the grating moves a full cycle every second. Preview the stimulus and you will see that it now moves at a constant speed to the right.
The grating should move sometimes to the right and sometimes to the left, to achieve that, change the value type of phaseSpeed to variable.
Now click the Lists menu and create a new list of numerical values. Change its name to speedValues. Add 2 values to the list -360 and 360.
You can delete the previous list: rotationValues because your are not going to need it anymore. To do so, you can use the Edit button at the upper right corner of the screen or you can simply swipe the row with the item you want to delete from right to left.
Return to the Stimuli menu and change the duration of the stimulus to 0.2 seconds. Now the presentation of the stimulus will be very short.
Creating a fixation stimulus
You need to create a fixation cross that will be briefly displayed before the the stimulus is displayed. Go to the Stimuli menu, create a new stimulus and name it cross. Change its type to patch and its shape to cross. Preview the stimulus and then change the length and thickness properties so that to the fixation cross looks the way you want.
Test structure
The test consists in only one section that contains 2 different scenes.
- section1: contains 2 scenes.
- fixation scene: a scene where a fixation cross is displayed for 500 milliseconds.
- presentation scene: a scene where the grating is displayed and the participant must respond.
All the scenes in a particular section are presented one after the other, in the same order in which they are in the menu of their section. The presentation of all the scenes of a section constitutes a trial of that section.
Click the Scenes & Sections menu and select section1.
Select scene1 and rename it to presentation.
Adding fixation scene
Return to section1 by clicking the upper left navigation button.
Add a new scene and change its name to fixation.
Add a new object in the scene from the cross stimulus.
Change the durationValue of the scene to 0.5 seconds.
Click the upper left navigation button to go back to section1.
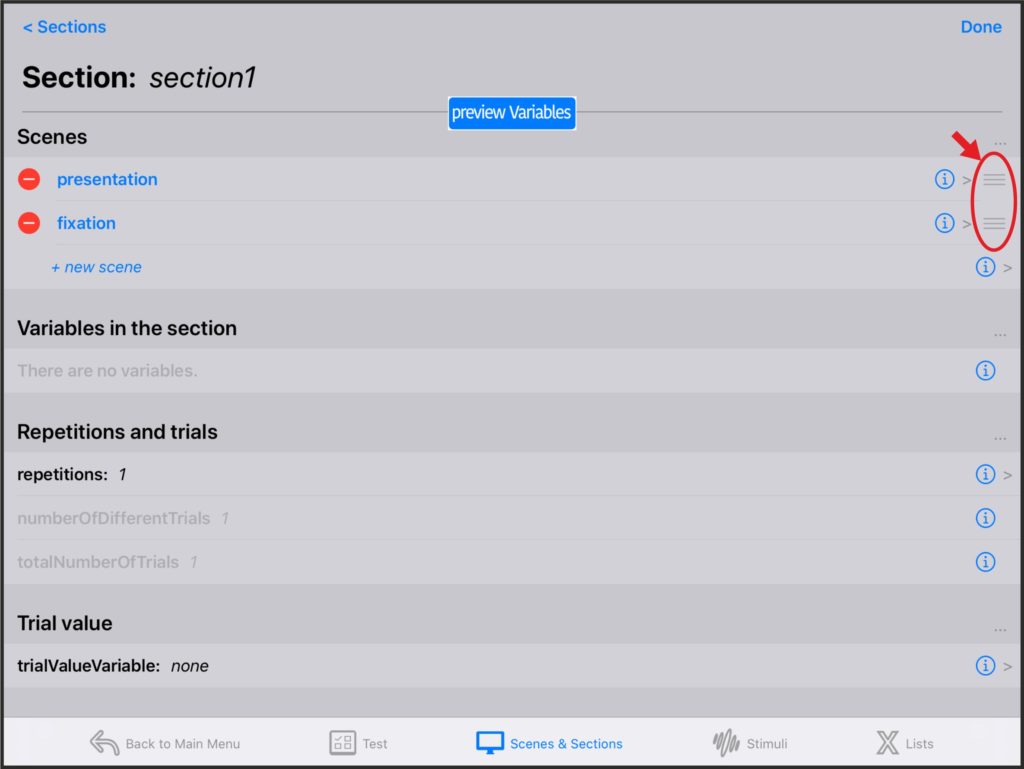
The order of the scenes in the section determines the order in which they are presented. You must change the order so that fixation is presented before presentation.
To do so, click the Edit button in the upper right corner of the screen.
You can now move the scenes by clicking and dragging from the symbol that has appeared on the right side of each row. Put the fixation scene before the presentation scene.
Changing the variables in the section
Go back to section1.
There should be a new variable in the section: presentation_object1_phaseSpeed.
Select the variable and assign the speedValues list to it. Change its selection method to all values in random order.
Now there are 2 different trials, one for each of the possible values. The order in which they appear will be randomly chosen each time the test is performed.
Go back to the section menu. The numberOfDifferentTrials has changed.
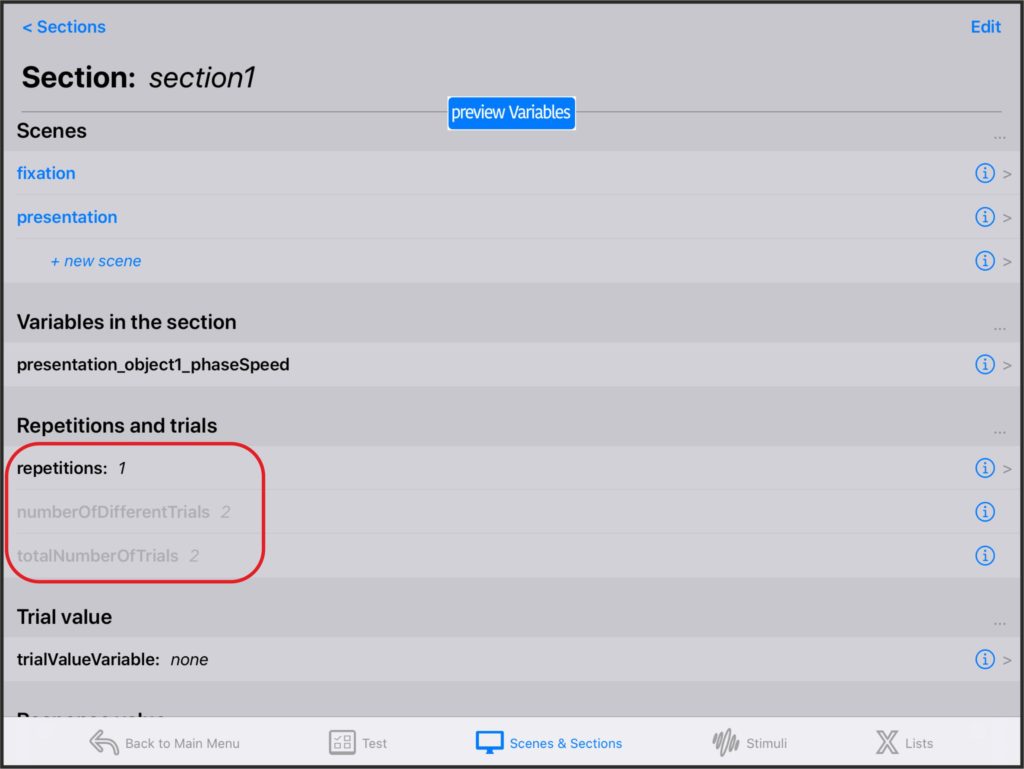
Change the number of repetitions to 5. The totalNumberOfTrials will be now 10 trials. Click Preview Variables to preview the values of presentation_object1_phaseSpeed for each trial.
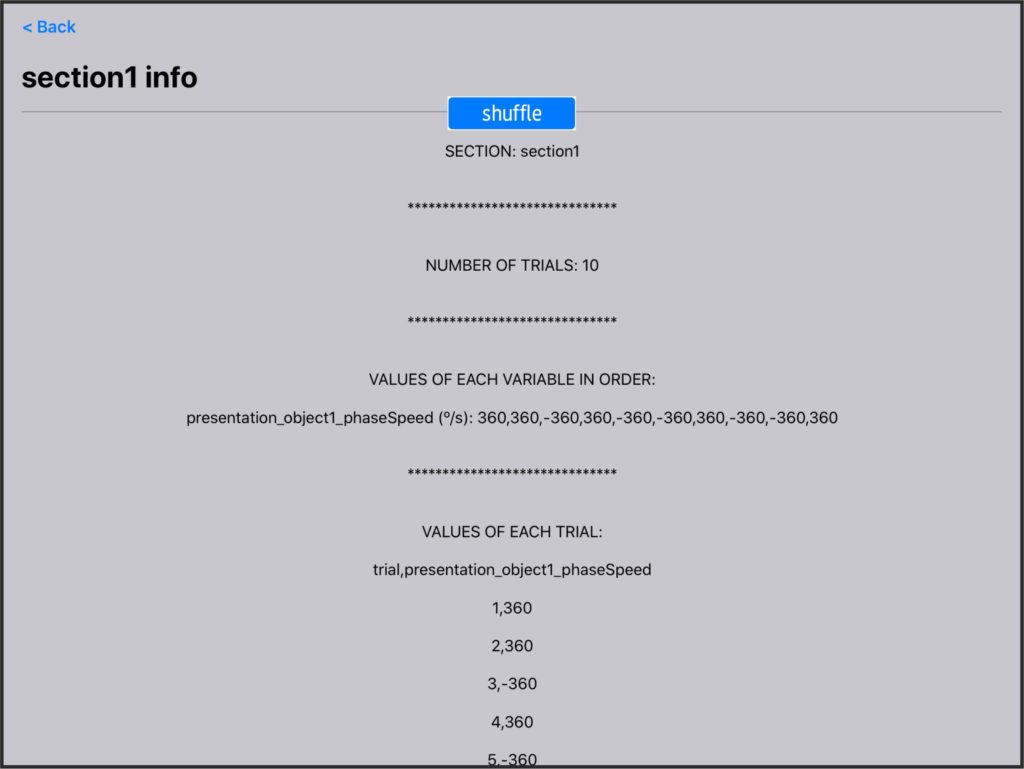
Click the shuffle button, to simulate a new test with other possible order of the values.
Having selected all values in random order, it is guaranteed that there will be the same number of trials for each value, in this case there will be 5 repetitions of the -360 value and 5 repetitions of the 360 value.
Run the test
Go Back to the Main Menu, click Run Test, select the new test and perform it.
Summary
- Duplicate the previous test: FirstTest and change its name to motionDiscrimination.
- Go to circleStimulus and make the value type of rotation constant.
- Make the value type of the phase property time dependent with a linear function.
- Change the unit of the phase property to degrees.
- Change the value type of phaseSpeed to variable.
- Change the duration of the stimulus to 0.2 seconds.
- Go to the Lists menu and create a new list of numerical values.
- Name the new list speedValues and add 2 values to it: -360 and 360.
- Go to the Stimuli menu, create a new stimulus and name it cross.
- Change its type to patch and its shape to cross.
- Go to the Scenes & Sections menu, select section1 then select scene1.
- Change the name of scene1 to presentation.
- Assign the values of the speedValues list to the presentation_object1_phaseSpeed property.
- Make the selection method for this values all values in random order.
- Back in section1 change the number of repetitions to 5.
- Create a new scene and name it fixation.
- Add a new object in fixation from the cross stimulus.
- Back in section1 change the order of the scenes so that fixation comes before presentation.
You can download a version of this test from the downloads menu of this web page.
Go to the next tutorial to add a instructions section to the test.